Nostril piercing
Nostril piercings are the most populair piercings when we look at face piercings. I can honestly say I have never seen a nose that does not look good with a nostril piercing!
What are nostril piercings?
What’s in a name? :) Nostril piercings are piercings placed in the nostrils of the nose.
(infographic: anatomie van de neus en neusvleugels)
Anatomy and nostril piercings
As with ears, noses come in different shapes and sizes. Luckily it is never the question if we can pierce a nostril, but where we will pierce the nostril.
When we look at the nose, we see a crease in the nostril. With some people this crease is more defined than with others. This crease is often used as a guide to place piercings. The most common placement is right below the crease. Inside the crease is often the placement that “feels right” for the client, but there is something to be said by avoiding an in crease placement. The crease is a place that has a lot of movement while flaring the nose, smiling, showing almost any emotion really. it is also a place where skin oils and dirt can build up and you don’t want any of that in a fresh piercing. That being said, with a little bit of extra care and cleaning an in crease nostril piercing can be stunning aswell.
Types of nostril piercings
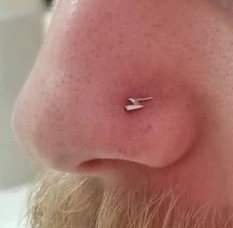
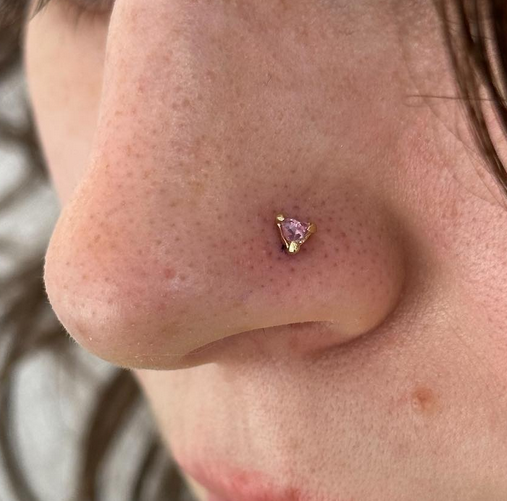
- Basic nostril piercing: like we talked about just now.
- High nostril piercing: These are placed high on the nostril, but still under the nasal bone.

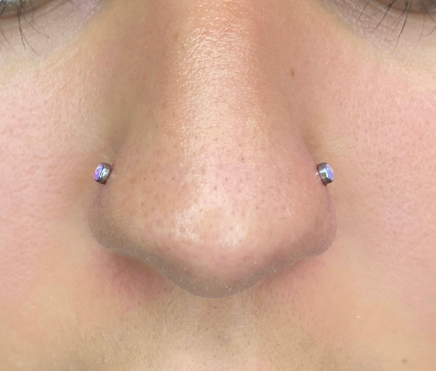
- Paired nostril piercings: a nostril piercing on each side of the nose, sometimes connected together with a chain.

Jewerly for nostril piercings
Nostril piercings deserve in depth information about jewerly choice, as there are so many options available.
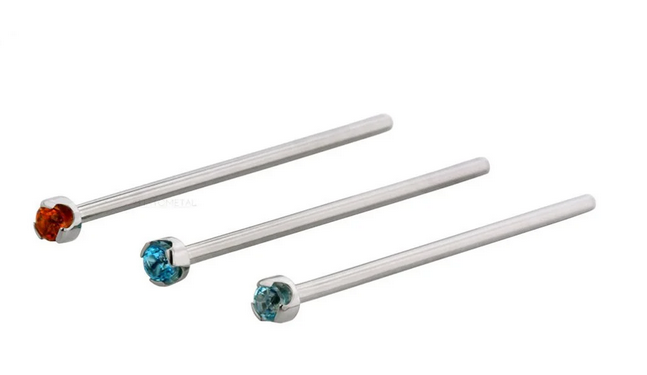
Nostril screws
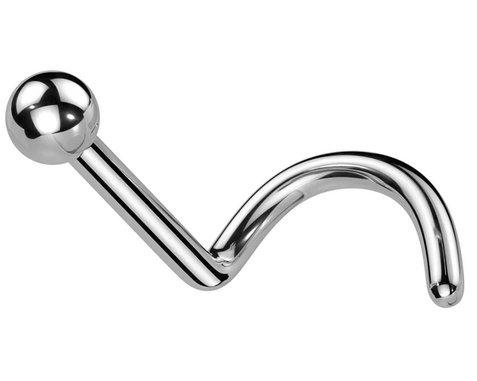
Perhaps the most common known jewerly used for nostrils are nostril screws. They have a unique shape, with the stud on one end, attached to a bar and ending in a coil. While they can actuaslly be used as initial jewerly for a nostril piercing, it’s not our favourite at all. These days the do not come pre-bent anymore, but more like a wire-type style that you can bend on your own to suit your client anatomy. They make a 90 degree bend that can put a lot of pressure on the piercing channel. There is also a fair amount of metal on the inside of the nose where boogers can attach and make for an uncomfortable feeling. When gravity does it’s job and the coil turns downwards, it is often visible outside of the nose.

Nose bones
Nose bones have the stud on one end, and a thicker part of metal on the back. it’s all one piece so no part of the piercing can come undone. The thing here is that with installment and removal, the thicker part needs to be forced through the piercing channel, this may cause the piercing channel to stretch out every time and tiny tears in the tissue can occur. Not very pleasant of course
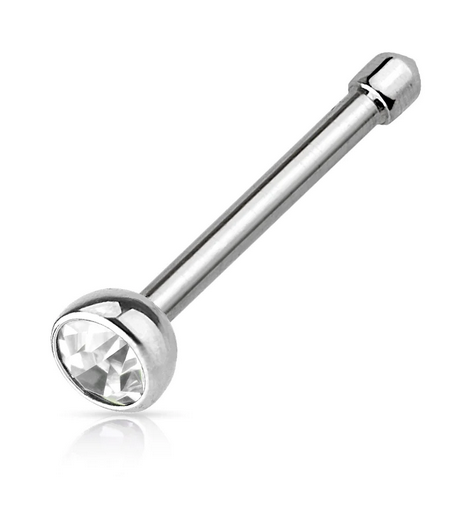
Labret posts
Labret posts are the preferred jewelry choice for a nostril piercing. No need to “force” anything through the channel, no pieces of metal that can hang out of the nose. Just a labret and the top on, and that’s it. Because the back of the labret needs to be held to open or close the piercing, it can be a bit tricky to shove your fingers up the nose, but that’s a small price to pay for a quality piercing that is firmly and safely in the piercing channel. There is a type of foreceps that allows you to hold the disk of a labret which is ideal for removing and changing lebret posts in nostrils, but using this means you have to reprocess it after every use (see topic “Processing and reprocessing”) Up to you if this is worth it to you or not.

Let’s talk sizing for nostril piercings. Most people want a small stud or (eventually) a thin hoop in their nostril. For that reason, I usually pierce them at 18G (1mm). You can do them at 16G (1.2mm) without a problem, but the piercing hole will be a bit big for a thin hoop, or a small stud of 1.5mm. There is a chance that the stud will be pulled through the piercing channel if the client snags the piercing in this case. 7mm length is the minimum to allow for zwelling.
If you do high nostrils you have to take into account that the higher you pierce, the more the nostril will swell. For this reason, use a labret post of 16G (1.2mm) of at least 10mm length.
How to perform a nostril piercing
We will use a large receiving tube to perform nostril piercings, to catch the needle (see topic “Hardware and disposables used while piercing”).
- Put on a pair of non-sterile gloves.
- First, feel the inside of the nose to check for any bumps or irregularities that could cause the piercing to be crooked. Chanche to a new pair of non-sterile gloves.
- Do your first skin prep (see topic “Sterile working”) and mark the piercing. Have your client check out the marking in the mirror.
- Do your second skin prep (see topic “Sterile working”) on the outside of the nose. For the inside, use a saline solution like Neilmed aftercare (see topic “Aftercare”) on a sterile cotton swab to clean. We will not use any disinfectant on the inside of the nose because this might irritate the mucous membranes. Change into your sterile gloves.
- Place the angled side of the receiving tube on the inside of the nostril, making sure the opening of the nostril is on your mark. Feel the outside of the nose with your finger, you should feel if the opening of the receiving tube is correctly placed and it will catch your blade.
- Plase the top of your blade on your mark, holding your blade perpendicular to the skin. When you pierce at 18G (1mm), the bevel towards the feet of the client. The bevel is too thin to make a big difference. It will pull the piercing slightly up which will make a future hoop sit snug against the outside of the nostril, but not enough to make the healing harder. If you pierce at 16G (1.2mm), angle your blade to adjust the bevel.
- While giving counterpressure with the receiving tube, puch the blade through the skin. Go straight until you feel the blade hitting the receiving tube, then angle the blade down to follow the receiving tube.
- Connect the taper to your blade and slide through the piercing channel. Dispose of your blade in the charps container.
- Connect the labret to your taper and slide back through the skin until your labret is in place.
- Put on the top of the piercing and clean.
(infographic: bevel 18G zorgt ervoor dat het ringetje mooi aansluit later)
Healing time and common issues of nostril piercings
A nostril piercing can take 6 to 9 months to fully heal. Clients should wait at least 4 months to switch to a ring. Because of the high movement of the nostrils, these piercings are very sensitive to irritation bumps (see topic “Possible complications”).
Also, snagging the piercing happens very fast. Think about while washing the face, removing glasses or blowing the nose. These can all cause irritation bumps. The use of face creams and make-up can also lead to irritations, so it is best to advise your client to stay away from these things for the first 2 to 3 weeks.